以下操作均在阿里云服务器上完成。
一.在centos上安装Google身份验证器
- #安装eplel库
- sudo yum install epel-release -y
- #安装google-authenticator
- sudo yum install -y google-authenticator
二:在liunx上切换到需要用到双重登录的账号上执行
- google-authenticator

三:为ssh配置Google身份验证器
- ### 1.修改PAM配置文件
- $ sudo vim /etc/pam.d/sshd
- # Disallow non-root logins when /etc/nologin exists.
- account required pam_nologin.so
- # 添加这一行
- auth required pam_google_authenticator.so
继续:::
- ### 2.在SSH配置文件里启用 ChallengeResponseAuthentication
- $ sudo vim /etc/ssh/sshd_config
- ChallengeResponseAuthentication yes
继续:::
- ### 3.重启SSH服务
- $ sudo service ssh restart
四: 如果手机是ios,就去apple store里搜索“Google Authenticator”,如果是安卓,就去应用商店搜索“谷歌动态口令”。
安装完后,打开App,点击“开始设置”,选择“扫描条形码”扫描上面google-authenticator命令生成的二维码,或者是选择“输入密钥”,然后手机上就能看到对应的六位数认证码了。
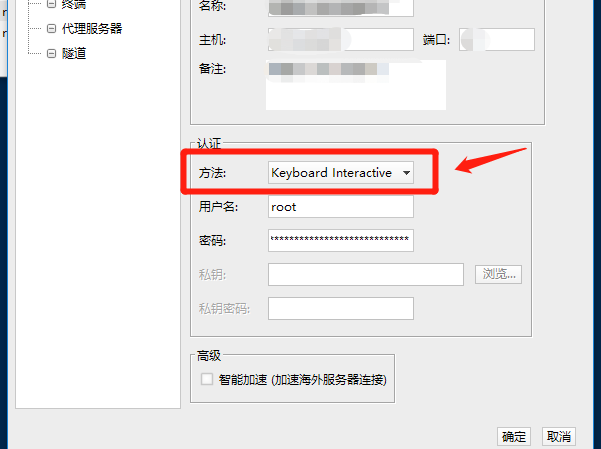
最后一步,返回xshell,修改登陆方式,
设置登陆方法为Keyboard Interactive,如下图:

如果是 FinalShell 则选择登录方法如下图: